CCNA Practice Part 3: Network Management with SSH
The next step in configuring my network is to configure my management VLAN. This will be its own subnet with a network address of 192.168.0.224/27, which is the last block of address space I have left in the original 192.168.0.0/24 network.
- 1. Management Interface
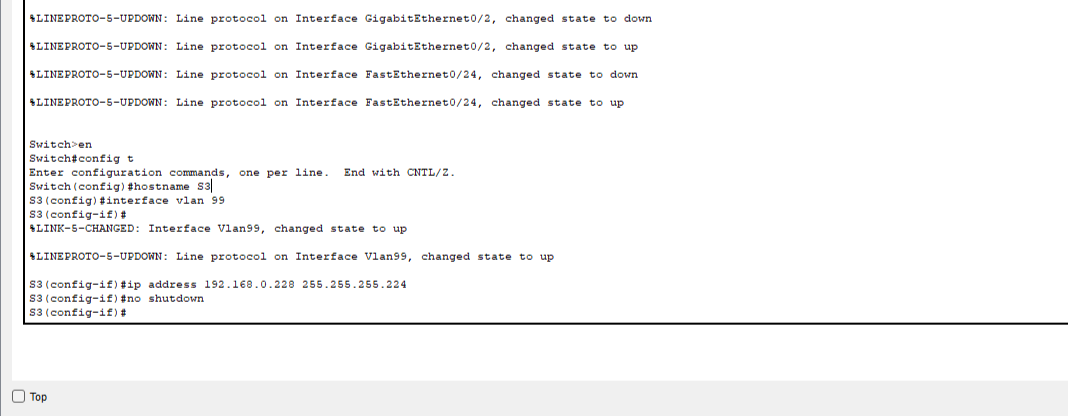
The management VLAN, much like the other VLANs, will need to created on each networking device with the command Switch(config)#vlan 99. I already did this when creating the other VLANs on the network, but what I didn’t do was create a management IP interface. This is a virtual interface to which our SSH traffic can be routed. To create this interface, I will use the same commands on each switch. The only difference will be the IP address, which will vary. For S3 in the example, it is as follows:
- 2. Default Gateways
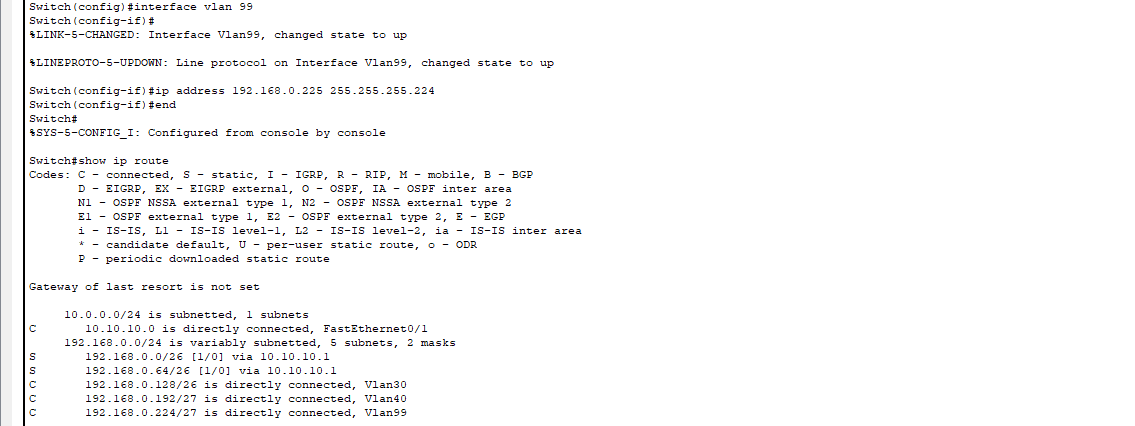
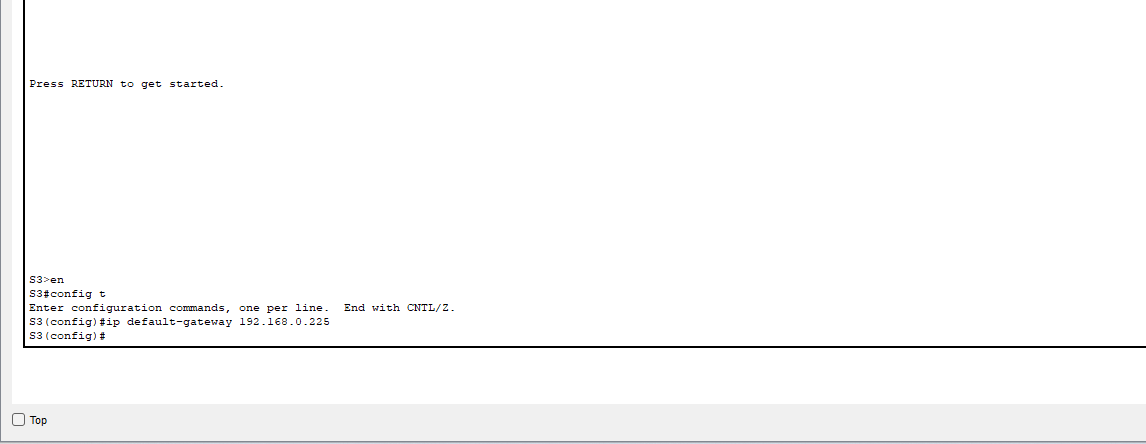
The management interfaces on this network are on a different subnet than the SSH clients that will need to connect to them, which means I need to establish inter-VLAN routing between the management subnet and the other subnets. To do this, I will create another virtual interface on each of my layer 3 switches. These will act as a default gateway for management traffic to and from network devices. As seen in the example, the management network address is now a directly connected network in the routing table with the exit interface being our virtual VLAN 99 interface. Once this is done, I need to make sure that the management interface address is set as the default gateway for my network devices being managed.
This enables the management network to communicate with SSH clients in the other subnets.
- 3. Configuring SSH on Network Devices
To use SSH, the network devices need a few configuration changes. First, they need unique host names and domain names to identify the device. They also need users with secure passwords, a pair of SSH keys (similar to the ones I use to log into this web server, which I documented setting up in this post), and they need the vty lines on the switch to transport SSH protocol. This can all be done in a few simple commands:
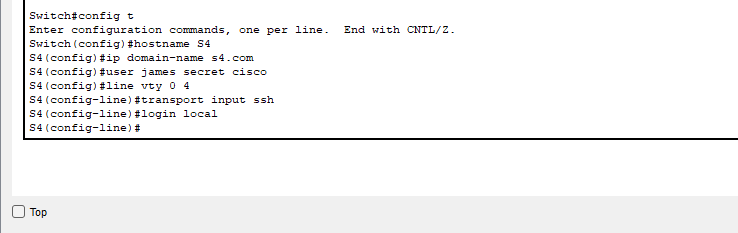
Using the keyword “secret” on the user command automatically encrypts the password locally in the switch’s configuration files. I also went ahead and changed the running version of the SSH protocol to version 2, which is not the default but is a security best practice to use instead of version 1.
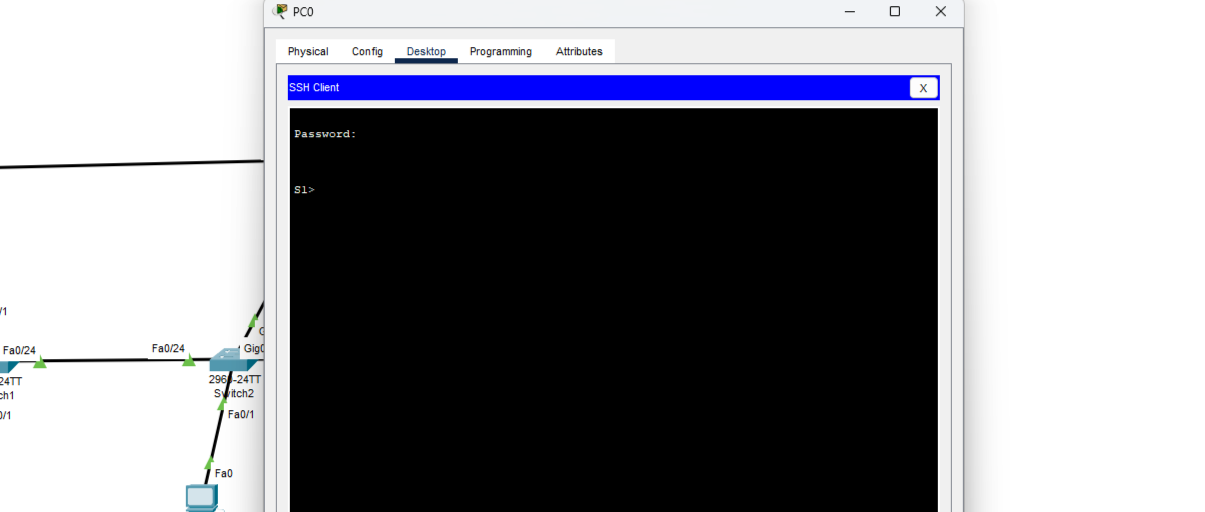
- 4. SSH Client
Now, all that’s left to do is open up an SSH client and see if a connection can be established between a host on one of the other subnets and a switch on the management subnet.
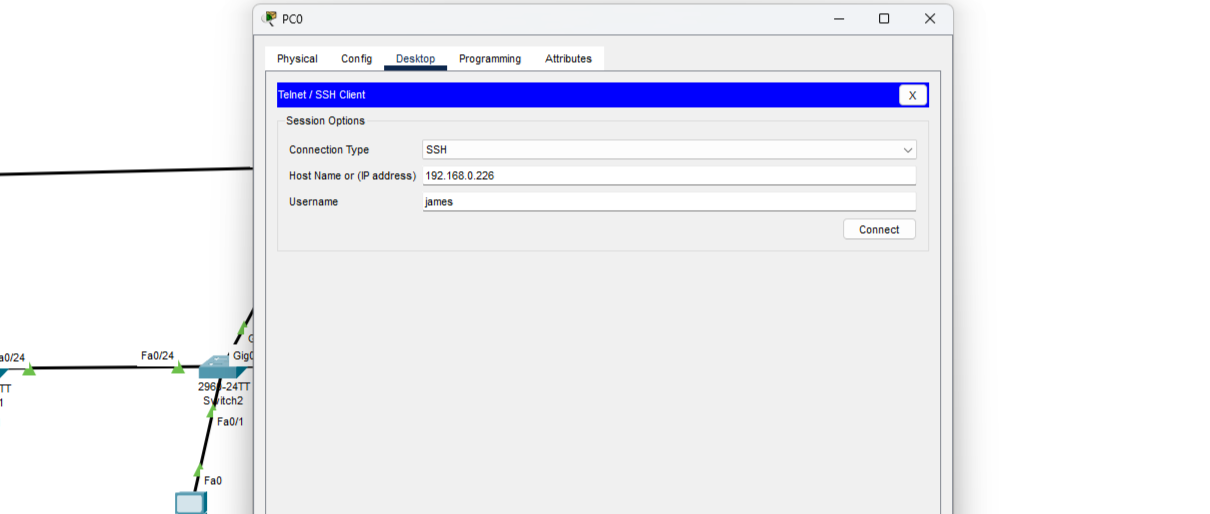
It works! I have successfully configured management interfaces and SSH connectivity on my network.