CCNA Practice: Inter-VLAN Routing
The next step in my CCNA practice lab will be to configure inter-VLAN routing. Right now, hosts in different VLANs are not able to communicate with each other because they belong to different subnets. For them to communicate, I need my layer 3 switches to have routing enabled.
- 1. Default Gateways
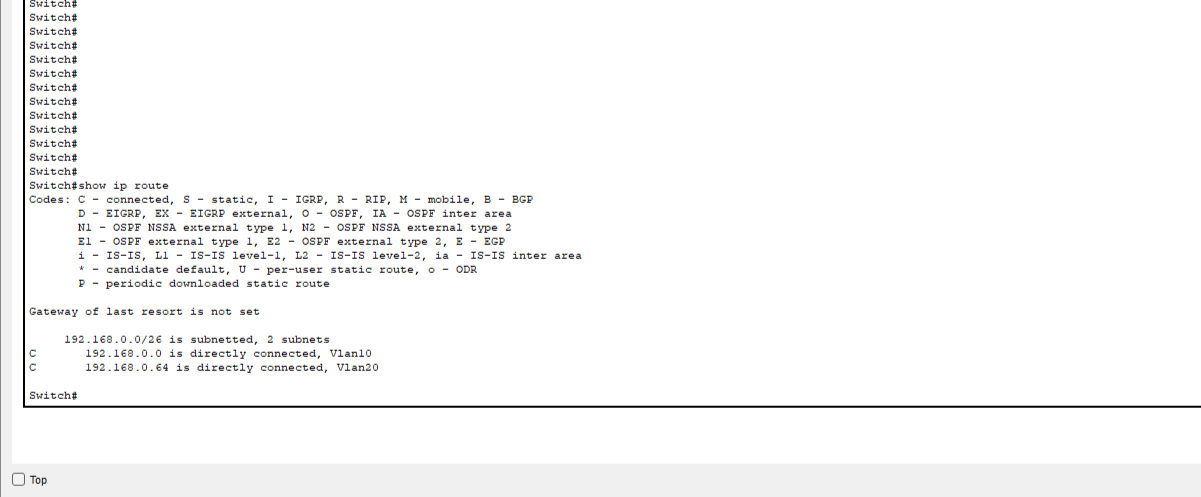
I covered the set-up of virtual default gateways for each subnet in my last post. However, I want to clarify that two default gateways are on one layer 3 switch and two are on the other. The two networks that share a layer 3 switch can communicate once the “ip routing” command is entered in configure terminal mode. However, they cannot communicate with the other two networks they do not share a layer 3 switch with. The reason for this is because the routing table of the layer 3 switch will automatically add routes to directly connected networks as can be seen in the image below.
Routes to the other networks need to be added to the routing table. While there are protocols available for learning these routes dynamically, in this network, I am going to statically configure the routes so that all four networks know about each other and can communicate.
- 2. No Switchport
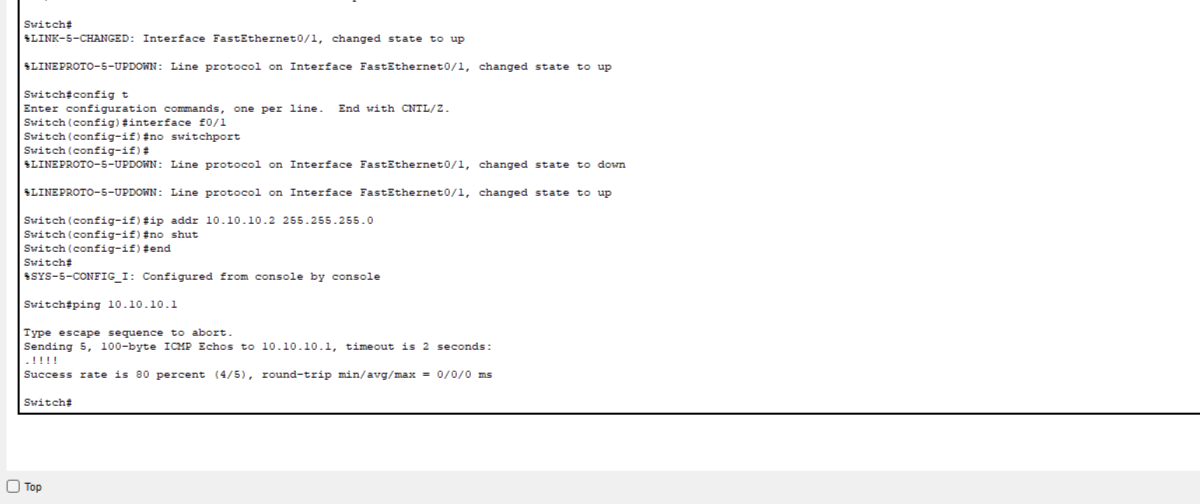
Before I can add a static route to my routing table, I need to configure a layer 3 route between my two layer 3 capable switches. Right now, the link between them is a layer 2 link, which means it is not configured for routing layer 3 packets. In order to make this link a layer 3 link, I need to go the FastEthernet 0/1 interface on each layer 3 switch and enter the “no switchport” command, which tells the switch that this interface is not a switchport anymore, but rather a routed port. Next, I simply configure an IPv4 address for each interface.
- 3. Static Routes
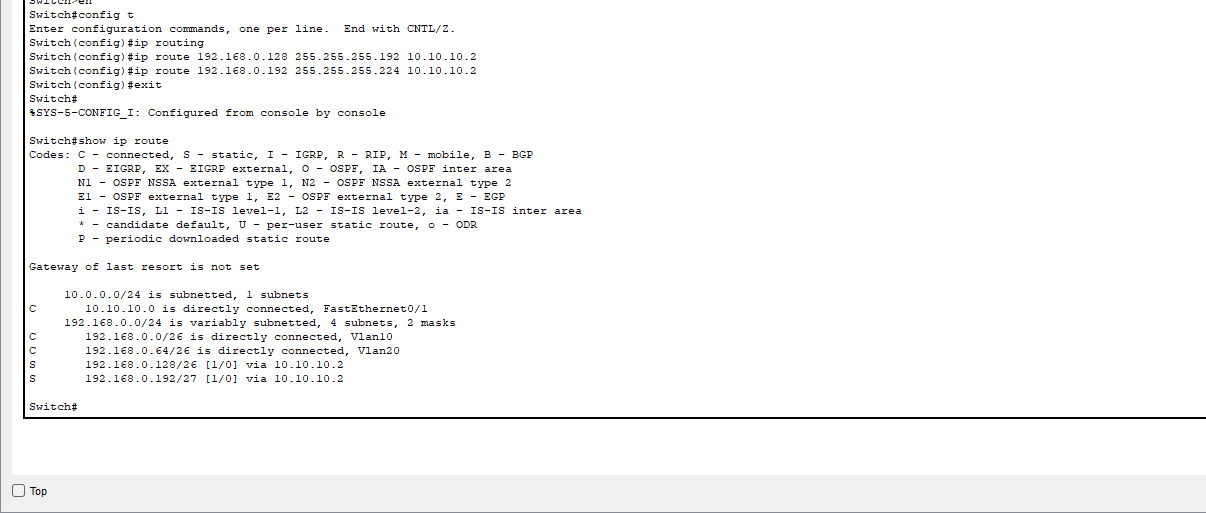
Now, I can manually enter my static routes into the routing table. All I need to do is give the L3 switch a target network address and a next hop interface, which is the f0/1 interface on the other L3 switch. After that, the routing table with contain information on how to reach all the subnets in our network and will then be able to route between them. Here are the commands I entered to configure the static routes on my first switch and the routing table afterwards.
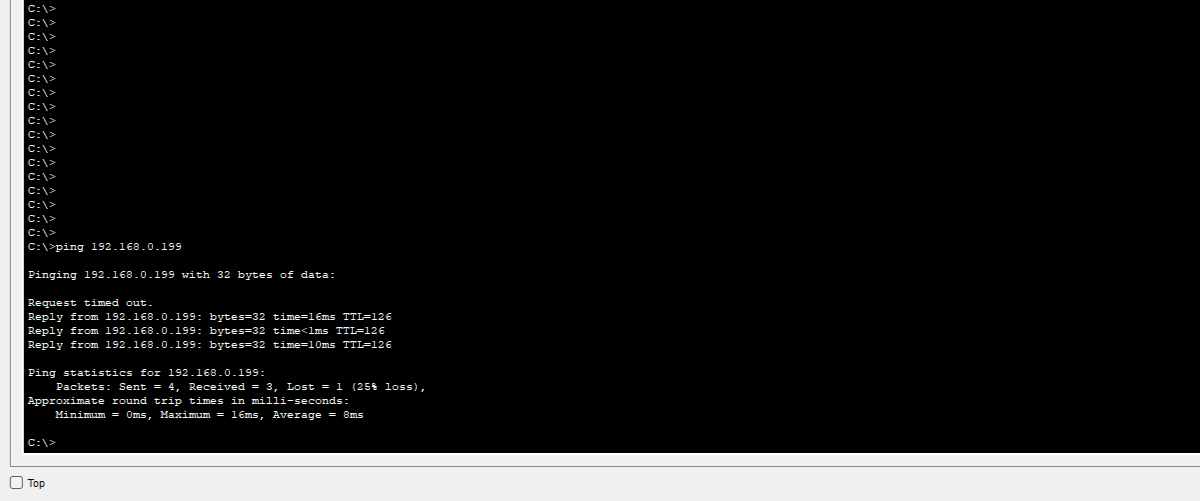
And here is a ping from a host on the 192.168.0.0/26 subnet to a host on the 192.168.0.192/27 subnet to prove that it works!
I’ve successfully configured inter-VLAN routing using layer 3 switches on the network! In the next practice session, I’ll configure the management interfaces on my network devices and configure basic security settings. Stay tuned!